An Alternative to Nailing
by Dave Farley
 [print this page]
The technology that is available in today’s market has brought forth some products that can offer useful alternatives to nailing. There are a few reasons you might choose to glue on a shoe instead of nailing.
• Poor quality hoof wall
• Missing hoof wall
• Thin soles
• Low, under run heels
• Hoof overly sensitive to impact of nailing
Be sure to use caution whenever you decide to glue on a shoe. Never glue over any abscess or area that is damp or has drainage. Never glue over a sensitive area in the wall (open crack). Never glue to the coronary band or the bulbs of the heel; apply vetrap to protect coronary band and bulbs. Always wear rubber or surgical gloves. Work in a well-ventilated area.
You need to be organized to save time and get the job done properly. Have all your materials and tools laid out and work in a systematic fashion. The colder the temperature, the more important it is to use a fast set glue and heat gun to accelerate set time.
Start by trimming the hoof. Rem
ove all flares, dishes, loose wall, sole and dirt and debris. Make sure your customers haven’t applied any dressings or oils to the hoof before you get there. If there are any oils present the chances of successful gluing are diminished.
The heel quarters and the back of the heel area are the most critical areas for achieving a good bond. Be sure to file all dirt and debris from these areas. The area doesn’t have to be smooth, just clean.
Pare the sole area and bar area to remove any debris. Make sure you have no pockets of dirt- covering these can create significant problems. Don’t over trim the frog- you don’t want material to bond here and some excess frog can help protect against bonding.
Once you have completed the hoof preparation you can prepare the shoe of your choice. Clipped shoes are always going to be more secure than unclipped. Be sure to fit the shoes full in the heel area, particularly on the under run heel. When you have fit your shoe, use an old sock or other type of cover to keep the hoof clean while you are preparing your shoe and material. You can use a spray-on degreaser as a final cleaning step before covering the hoof. Acetone is not recommended as it often penetrates the surface and doesn’t always dry completely. You should have your shoe completely finished at this point. Using an angle grinder or belt sander you should clean the foot surface of the shoe to be sure there are no oils present (from your hands or the horse.) Set it next to your mixing area. Your organization is now critical. Have all your materials beside the horse and ready to go. If you choose to use Spectra or fiberglass to reinforce the glue, have it cut and ready before you begin mixing the glue. Make sure you have enough glue before you start mixing.
You can now start mixing the glue. Be sure to wear gloves! Whether you use mixing cups or work on a piece of plastic be sure your material is thoroughly mixed. If you are using fibers, mix them in as you mix the glue. In warm weather you have to move quickly. When the material is mixed, remove the protection from the foot and begin applying the glue. Put a thin coat over the entire ground surface of the wall, including some of the sole area (1/2 -3/4"). Also apply a thin coat to the outer wall. Now put a heavier application on the heel quarters, extending up the wall- but not to the coronary band. You can now set the shoe.
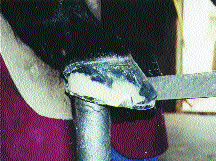
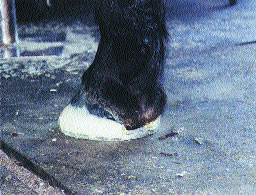
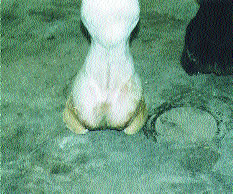
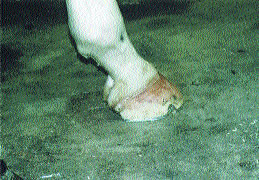
Place the shoe on the hoof and work the material to it. Be sure to get a good application to the inner web of the shoe where it contacts the sole. You should have a piece of mylar or rigid clear plastic to wrap around the entire hoof and sole area. Work the material with your fingers to be sure you have a good, continuous line of material. In the pictures you will see the important areas of coverage.
Wrap the hoof with vetrap or elastikon and continue to press the material and work it as it is setting. When you feel the material is firm enough, set the foot on the ground. Give it ample time to cure before uncovering and beginning your finish work. The material will gum up your rasp so keep a wire brush handy.
Try to schedule a reset within 4-5 weeks if possible. You can remove all the glue from the wall and use a pair of nippers to break the bond in the heel area. Be careful not to destroy any new hoof growth.
 |
 |
 |
| Photo 1: | Photo 2: | Photo 3: |
 |
 |
 |
| Photo 4: | Photo 5: | Photo 6: |
 |
 |
 |
| Photo 7: | Photo 8: | Photo 9: |
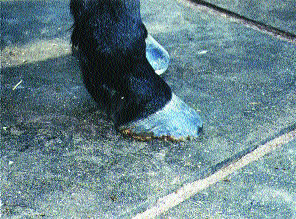
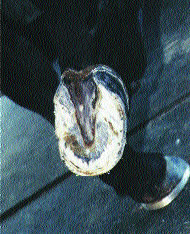
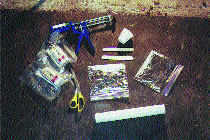
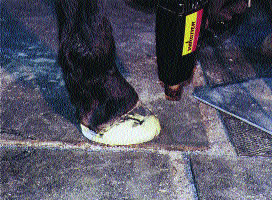
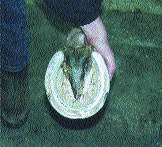
Photo 1: Foot before prep, notice shelly weak appearance of wall. Photo 2: Hoof prep is most critical step. Heel area and sole should be pared to solid, clean surface. Photo 3: Have your materials ready to go. Wear surgical or plastic gloves when working with repair materials. Photo 4: Once you’ve glued the shoe and it has set firm enough to put the foot down, a heat gun will help with the curing process. Photo 5: Rasp to finish. You’ll notice that very little material is needed in toe area. The material in the heel area is the most critical. Photo 6: Buildup of material in heel area provides strength to job. Photo 7: Another glue job showing the material buildup in the heel area. Photo 8: Side view shows material concentration in heel area. Photo 9: Ground surface shows material under shoe bonding to sole - be sure your sole area is cleaned well. Material coming through nail holes and filling crease helps secure shoe. |
||